
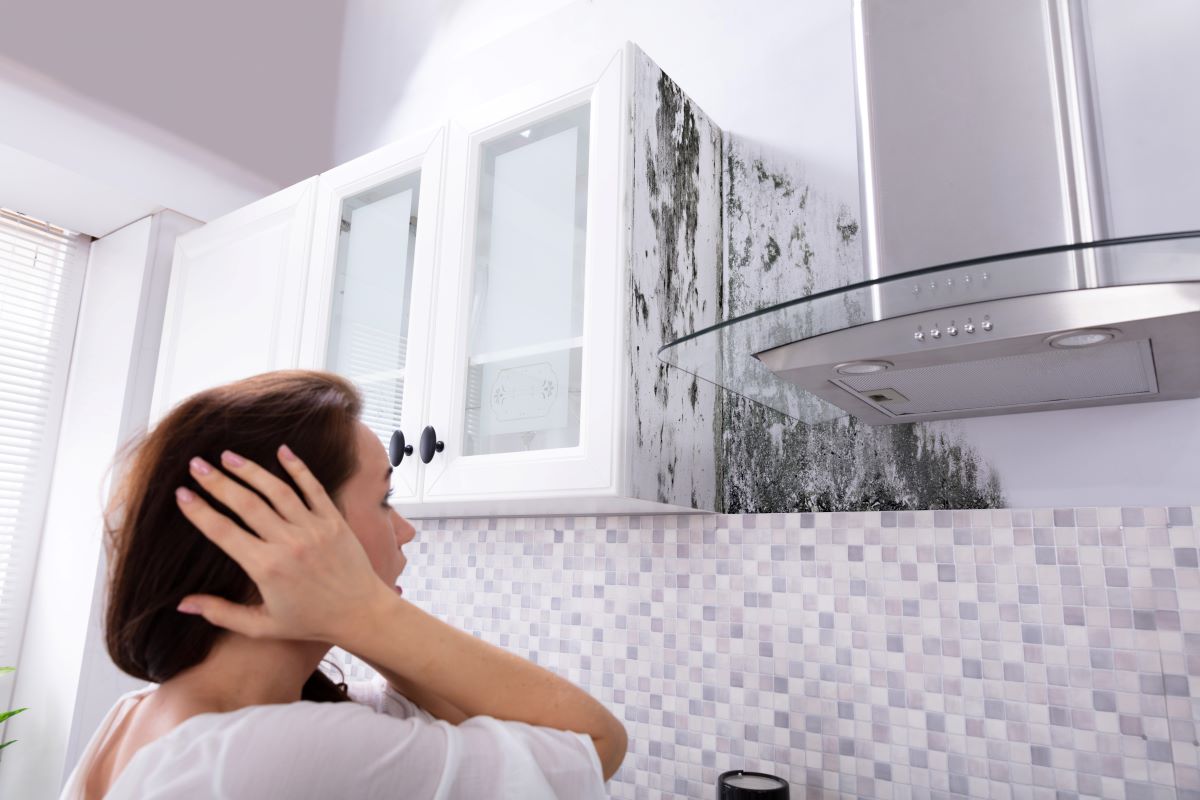
Do you know how to fix water damaged cabinets? Water can negatively impact the outer cover of a cabinet, ruining the paint and darkening the wood, which is just one part of the story for water damaged kitchen cabinets. It can also inflict structural harm, reducing the cabinet’s utility. This is particularly evident in most Northern New Jersey and New York City households with under-sink kitchen cabinets in the kitchen and bathroom—especially near the kitchen sink. Homeowners often see this sign of water damage when leaks happen.
When items have dried out, you can DIY home repairs to repair water damage and restore certain aesthetic and structural flaws yourself, but warping and plywood delamination might be severe enough that replacement is the only solution. But how to fix water damaged cabinets? Learn this essential restoration process to save your kitchen cabinet and avoid more issues.

Assess Damage: Water Damaged Kitchen Cabinet Check
The first critical concern is whether the cabinet is still structurally sound. This can happen if it gets soaked after a pipe explodes or if it’s discolored due to high humidity. However, if it has been damaged for a long time due to a constant leak or high humidity, the adhesive joints can be loose and the plywood warped—look for swelling as a key sign. If the drain or kitchen sink water valve overflows without your knowledge, the harm can be limited to the lower area of the cabinet.
The bottom shelf could be sagging and wet, and the plywood at the cabinet’s foundation could be delaminating. Assess the extent to understand if you can handle it with DIY or need professional help via email or call.
Structural Repair: Repair Water Damage Step-by-Step
After you have done away with the source of the corrosive water and allowed the cabinet to dry (it could take weeks) the majority of structural damage can be patched with carpenter glue, clamps and some strategically placed screws. Remember to clean first. Begin by applying glue to the delaminating pieces of plywood and fastening them along with C-clamps. A look inside the cabinet can show broken or split bracing.
It usually’s safer to remove the existing braces, reinstall them with fresh adhesive and screws, or uninstall them entirely. If you cut the old supports first, the screws will hold the cabinet for repairing together more effectively. This step will ensure the kitchen cabinet stays strong.

Cleaning and Staining: Restore Color and Finish
Bleach can remove stains during cleaning.
Oxalic acid efficiently prevents blackening caused by water infiltration in oak and other trees, although it must be used until the finish has been sanded off. Make a sufficient quantity of oxalic acid crystals and water (one in which no more crystals can dissolve) and spray it on the damaged wood.
When it dries, you will find a difference, but if not, scrub it further. When you’re done, put half a cup of baking soda in a liter of water and spray this onto the wood in order to neutralize, then rinse with clear water. The wood is ready when it is dry to be refinished. Use products of the same color of the original for a seamless look – easy enough if you work carefully.
Changing Out Spares: Replace Parts to Match
You might discover that removing a portion of the cabinet is your only option. As an example, when the bottom shelf becomes wet such that it is sinking, then you need to change it. Depending on the design of the cabinet, you might not be able to take it down as a block, hence the need to ensure that you make the necessary measurements before dismantling the cabinet. Should the veneer break on the side or the front of the cabinet use the best you may have a complete veneer you may stick to it with a fresh piece of veneer by applying rubbing cement, rather than peeling away the old one.
Only make sure to remove more of the old veneer as necessary before proceeding. Don’t hesitate to address more issues here to bring back the full kitchen cabinet look—not always expensive with the right experience.

Preventing Future Water Damage: Essential Tips for Kitchen Cabinets
Stop water damage before it starts—homeowners can save thousands by preventing leaks in kitchen cabinets. Here’s an easy, DIY way to protect your household:
- Put a drip tray under the sink in the kitchen: collect drips off of pipes or faucets. Weeks of small drips do not swell wood and can be absorbed by cheap plastic trays.
- Caulk edges of the cabinet: Coat the sides around the sink base so that water does not creep into the cabinet. Match the color to appear professional- it dries within hours.
- Movement barriers: Coat shelves with aluminum foil or waterproof vinyl sheets. This mandatory measure manages humid zones, and provides tranquility.
- Check pipes monthly: Tighten connections and watch for signs like rust. Remember, small leaks continue to cause more issues if ignored.
- Upgrade to water alarms: Battery-powered sensors (best picks here) alert your phone instantly—provide early warnings so you can address problems fast.
These work for Northern New Jersey homes too. Experience fewer home repairs and learn to restore only when needed, not expensive replacements.

FAQs: How to Fix Water Damaged Cabinets
What’s the first step in the kitchen cabinet restoration process?
Assess the water damaged kitchen cabinets for swelling, delamination, or more issues. Remove the water source and let it dry for weeks if needed.
Can I DIY repair water damage on my kitchen sink cabinets?
Yes, glue, clamps and cleaning products enable homeowners to handle numerous small DIY home repair, but high structural damage might require professionals.
What do I do to repair the color following liquid damage?
Stains can be stained with oxalic acid or bleach and then restored to original with baking soda and then refinishing. It is a simple means of saving your cabinets.
When should I replace instead of restore?
If warping won’t work or continue causing issues, replacement provides the best long-term fix—don’t hesitate to address it.
What tools ensure a good kitchen cabinet repair?
Essential items include carpenter’s glue, C-clamps, screws, and sanding tools to ensure everything fits and looks natural.
Conclusion: Master How to Fix Water Damaged Cabinets
Fixing water damaged kitchen cabinets doesn’t have to be overwhelming—follow this restoration process to repair water damage, restore your kitchen or bathroom space, and save on expensive replacements. Whether it’s a kitchen sink leak or humidity buildup, homeowners can learn these DIY steps with the right experience and products. Remember, acting fast helps prevent more issues and keeps your household running smoothly. Ready to tackle your home repairs?
Leave A Comment